Emulator Settings
Tools → Settings → Emulators → Settings opens Emulator Settings. It sets each emulator's options for a whole console, without starting a game first.
For one game, use Game Settings in the game's context menu instead. See Game Settings.
The emulator list
The page lists every emulator that runs at least one of your consoles, with the tags it covers beside it, such as Gambatte GB · GBC. Emulators for consoles you have no games for are not listed.
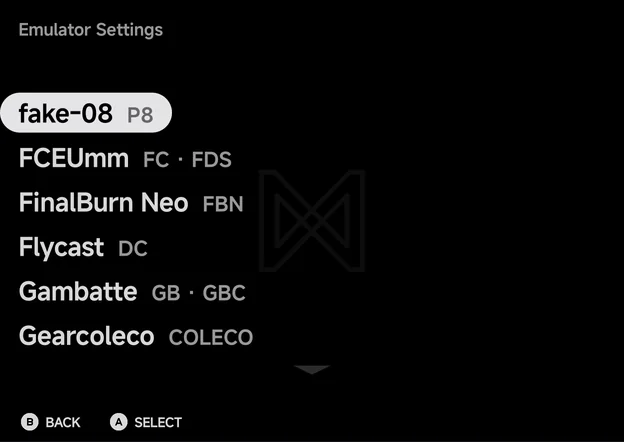
Press A on an emulator. When it covers more than one tag, the app asks for
the console first.
An emulator's settings
The page is titled with the emulator, the console and the tag, such as Genesis Plus GX — Sega Genesis (MD). It has two groups:
| Group | What it holds |
|---|---|
| Console settings | The app's own settings for the console: Controller Layout for every console but N64, Controller Type for Sega Genesis, Sega CD and Sega 32X, and the Layout and Big Screen rows for Nintendo DS. These are the rows of the in-game Console Settings page. |
| Core settings | The emulator's own options. Rows with › open a group of options, such as Video or Audio. |
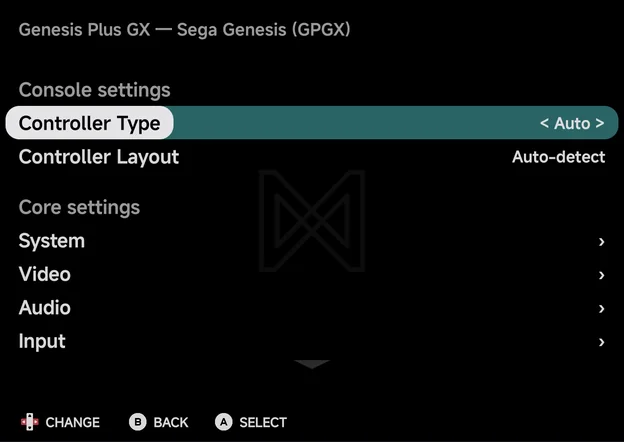
The shot shows a legacy Sega Genesis (GPGX) folder. A Sega Genesis (MD)
folder looks the same, with (MD) in the title.
LEFTandRIGHTchange a value.Asteps it forward too.- Each change is saved straight away. There is no Save row.
- The page also offers options that only take effect when a game starts, such as the N64 resolution. The in-game Core Options page leaves those out. The new value is used the next time you start a game.
- When the app cannot read an emulator's options outside a game, Core settings shows This core's options aren't available outside a game. Change them from the in-game menu instead.
What you set here is the console's setting. It is the same file the in-game menu's Save Changes → Save for console writes. See the in-game menu for the options themselves.
Game Settings
Open a game's context menu with MENU in a game list and choose Game
Settings. The same page opens over the list, for that one game.
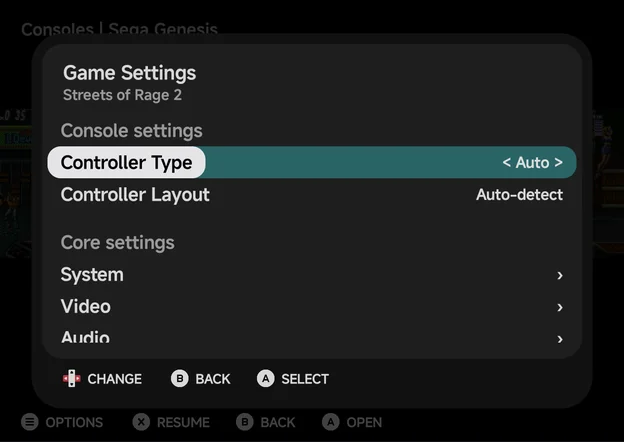
- The first change gives the game its own settings, starting from the console's. It is the same file Save Changes → Save for game writes.
- While the game has its own settings, the page starts with Use emulator
settings.
Aon it deletes the game's settings, so the game follows the console's again. Bgoes back to the game list, on the same game.
Default emulators
Some consoles can run on more than one emulator. Tools → Settings → Emulators → Default emulators picks the one used for a folder that has no tag.
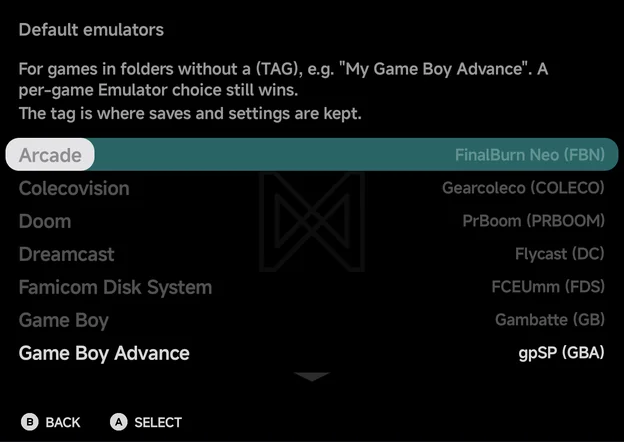
The page explains:
For games in folders without a (TAG), e.g. "My Game Boy Advance". A per-game Emulator choice still wins.
The tag is where saves and settings are kept.
Each console you have games for has a row, showing its emulator and tag, such as gpSP (GBA). Only two consoles have a choice, and their rows always show:
| Console | Choices |
|---|---|
| Game Boy Advance | gpSP (GBA), mGBA (MGBA) |
| Super Nintendo ES | Snes9x (SFC), Supafaust (SUPA) |
A, LEFT or RIGHT cycles them. The other rows are dimmed and only show
the emulator in use.
- A folder with a tag, such as
Game Boy Advance (MGBA), always uses that tag's emulator. - To switch one game to another emulator, use Emulator in its context menu. See Emulators.